Remote collaborations
3D print tag
Halldor’s visit is fixed, with the power of ERASMUS, he’ll be coming over for a week before ICLI. In the spirit of NIME, we’ll have not only a performance, but a 2day workshop to run with the instruments. Deadlines are good, right?
I’d never thought about the power of 3D printing for remote instrument building collaborations. Over the last few months we’ve scoured eBay & Gumtree for some cellos and started buying the core components for the cellos. What’s great about 3D printing, is that we can start design iterations even before Halldor gets here – essential as we’ll have just one week.
Armed with measurements of the cello fingerboards, Halldor sent over some .stl files, which we printed in the Engineering dept. At this stage, Halldor’s quite keen to try and make a non-invasive version. We’re pretty open to hacking them a bit. Great to think about this tho, for other people who might to try.
The first things to think about are how to fix the pick-ups under the strings, where to place the speaker and how to fix it to the cello.
Pick-up Brackets
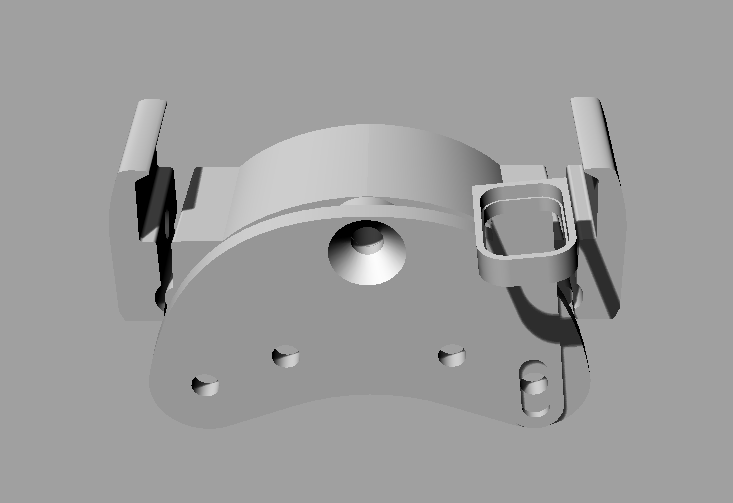
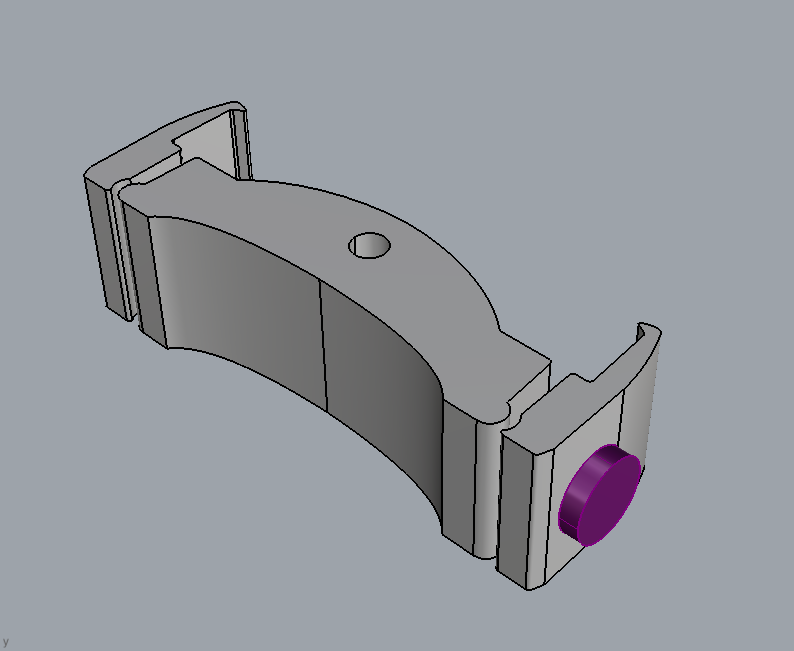 #1 pick up fingerboard bracket
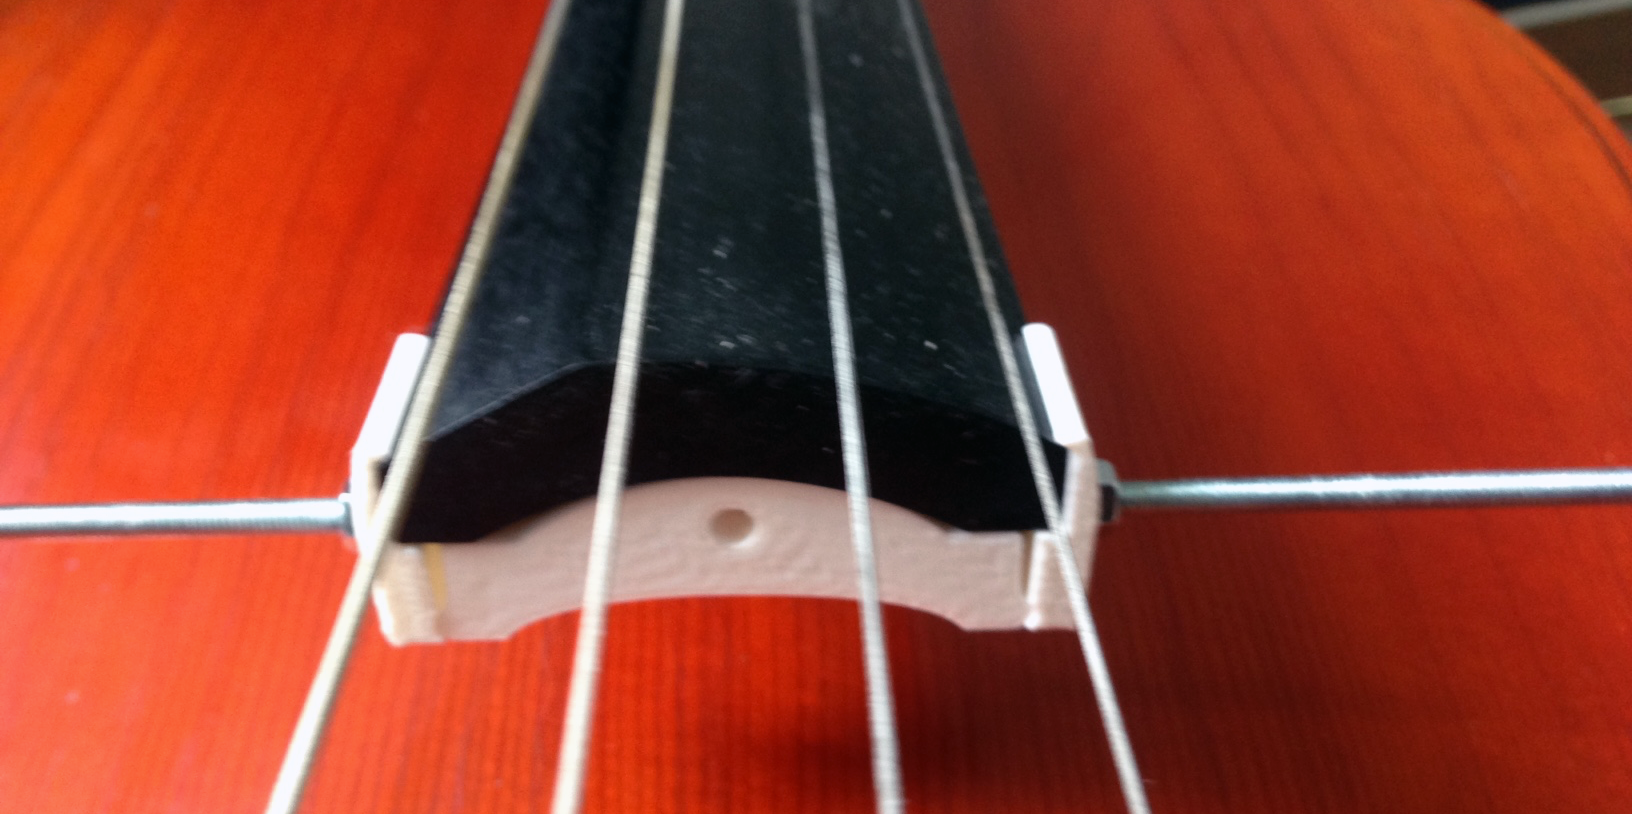 This fitted Chris’ cello really well
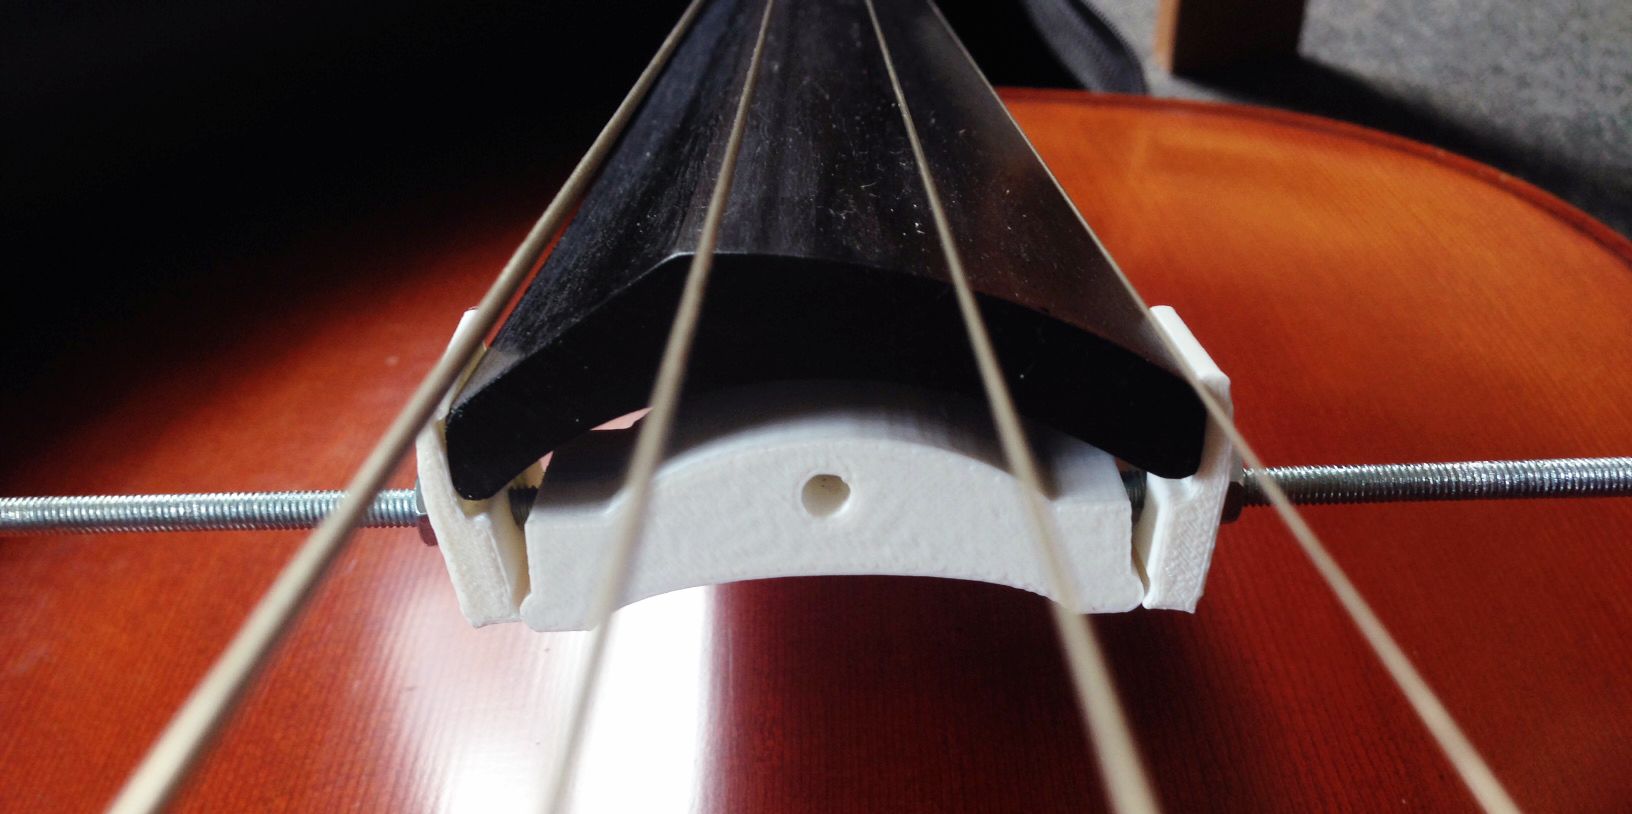 but needed a tweak for mine
With a solid connection onto the finger board, we can fit some adjustable arms with cups to hold the pick-ups, to allow control over the distance from pick-ups to strings.
Speaker placement
The next decision was where to fit the speakers. Describing our plans to fit a speaker inside the body of the cello illicited a sharp intake of breath from many luthiers. But on the advice of those who got what we were planned, we decided back lower left would be the best placement to minimise stress and prevent tearing the body.
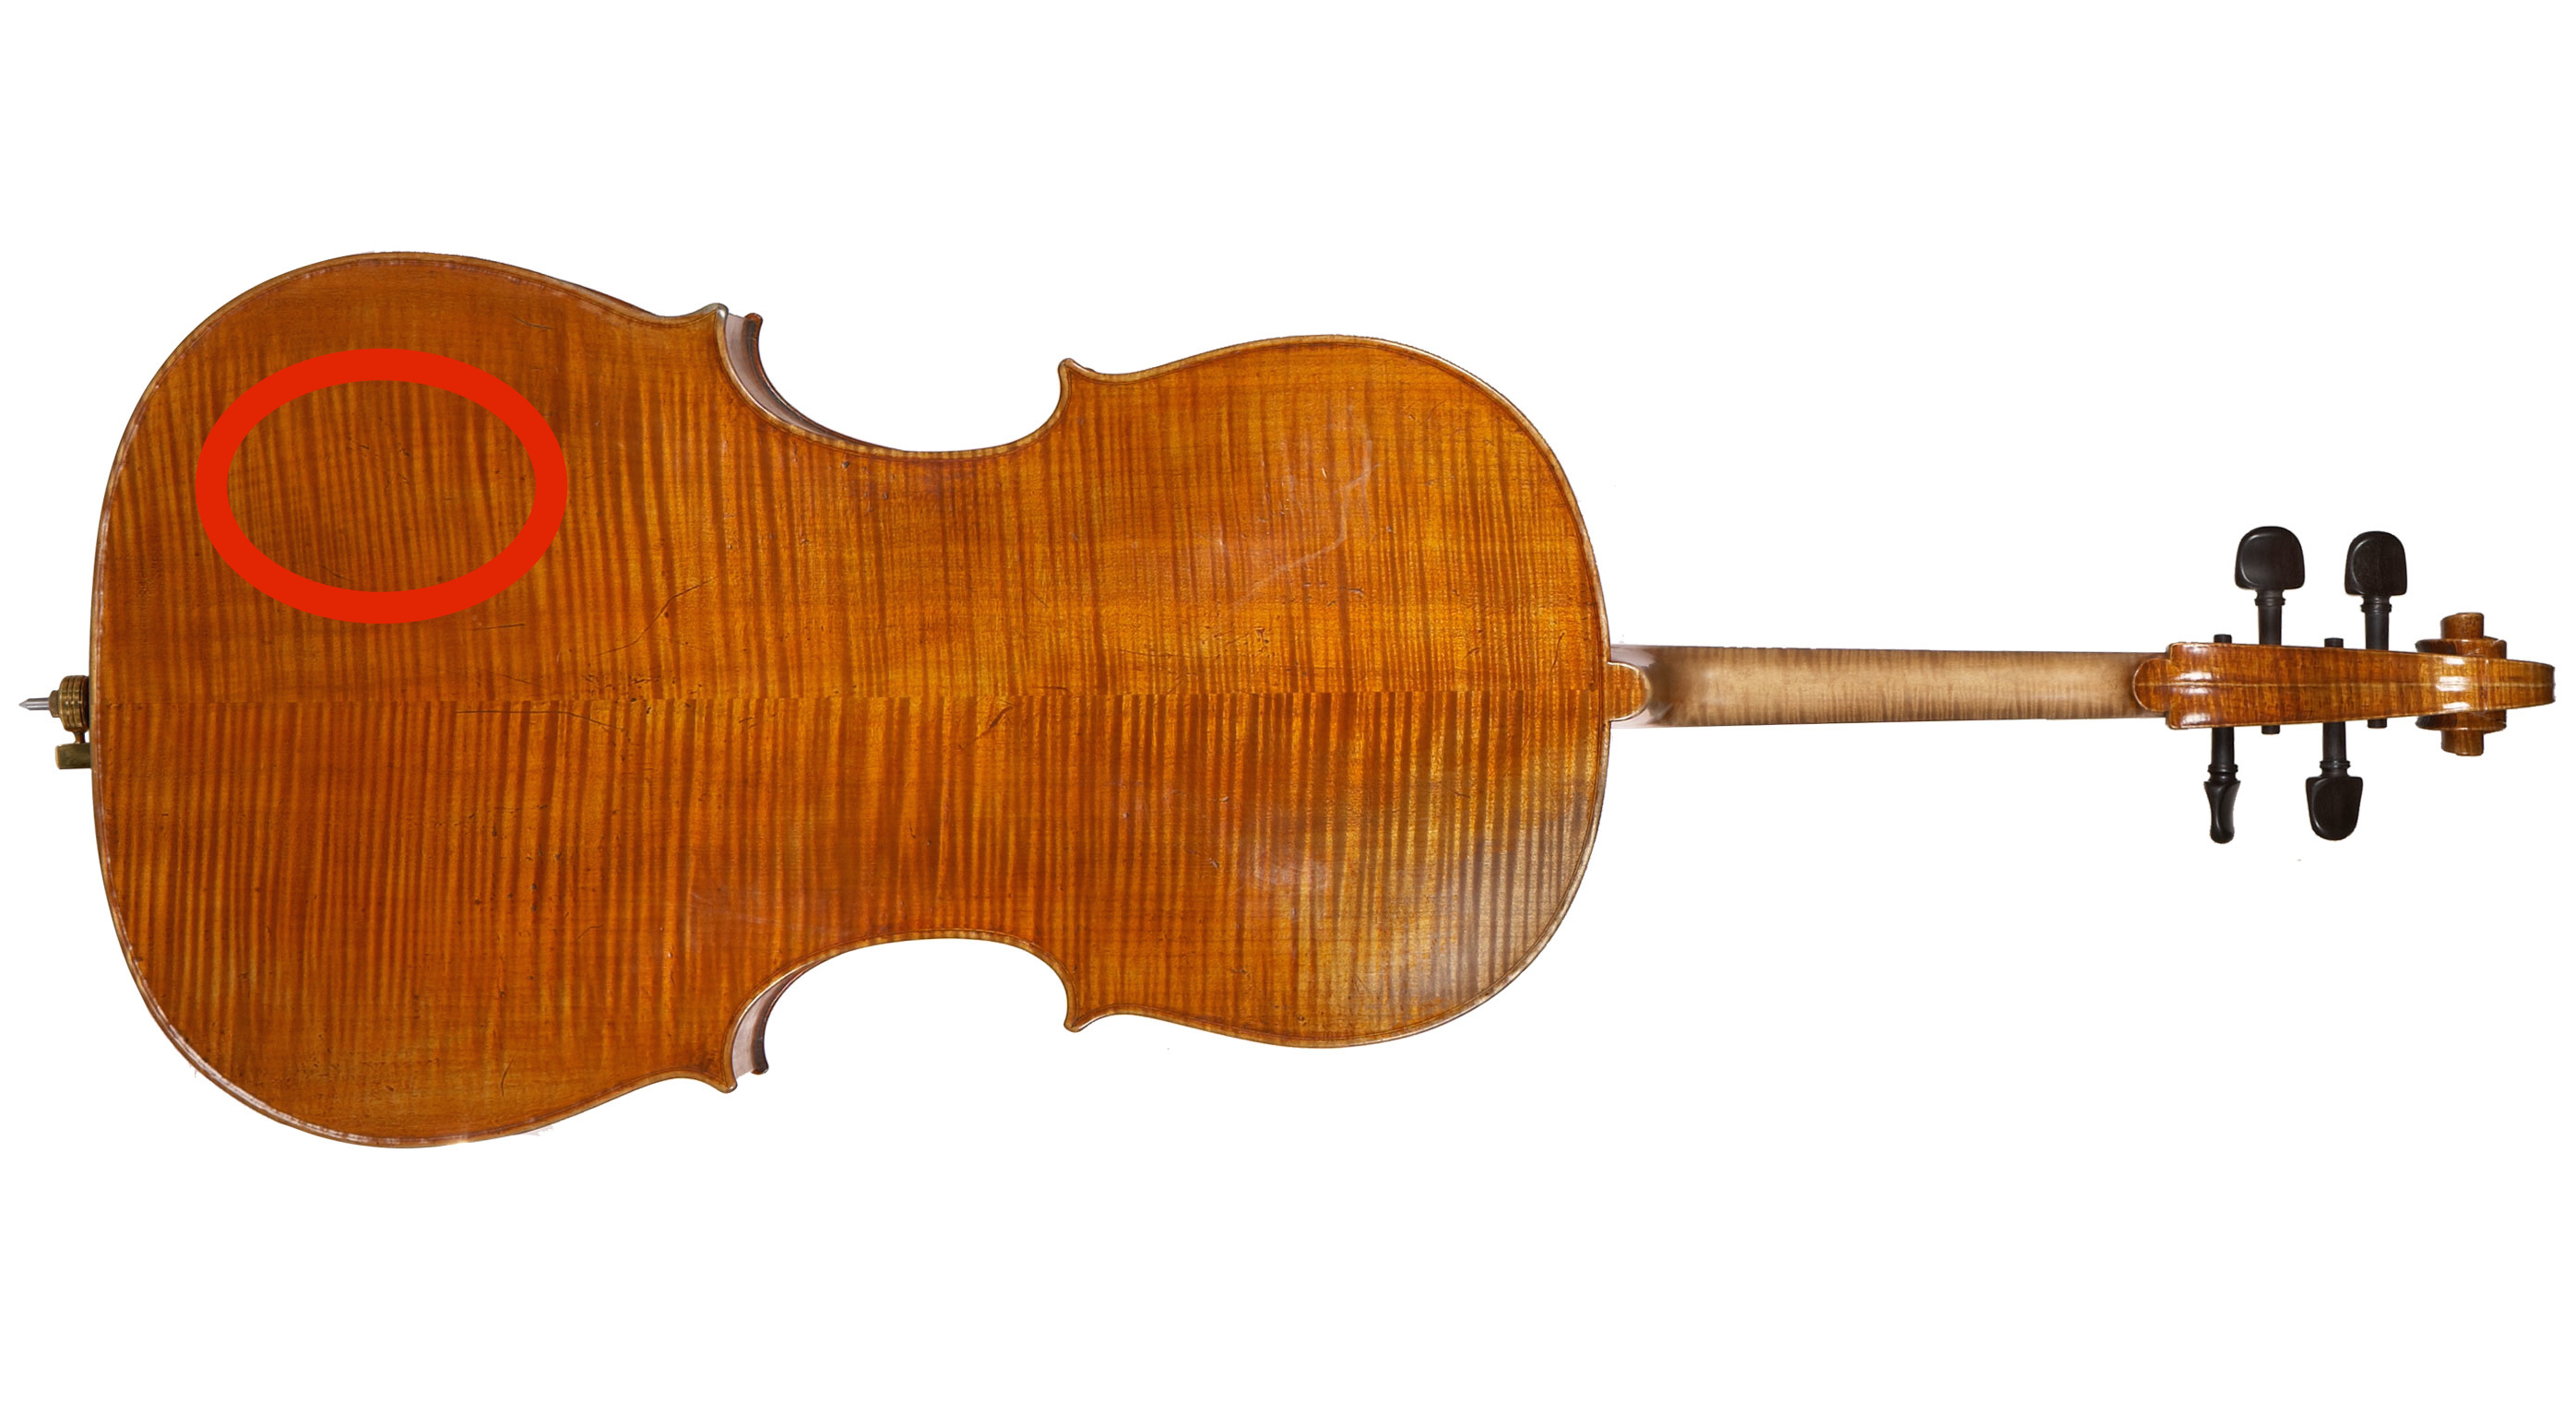 Planned speaker placements
Speaker fitting
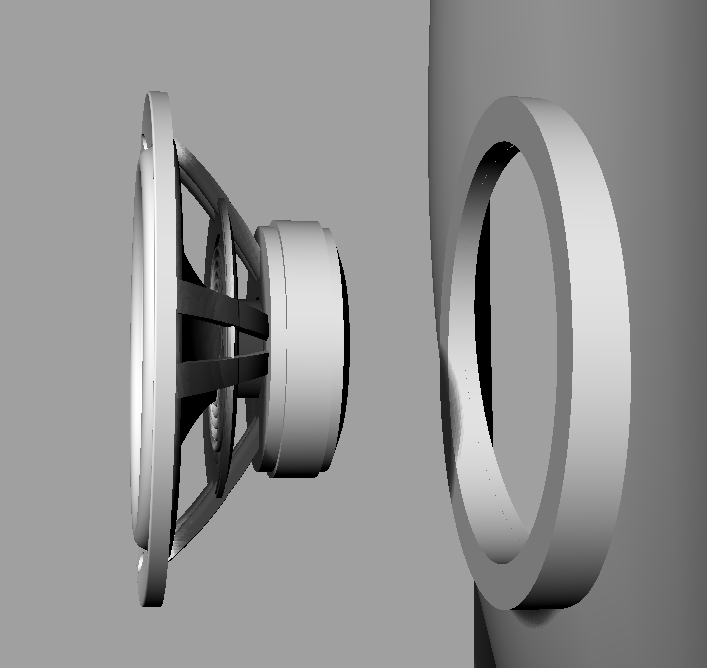
Cello backs curve in both directions, so in order to get a nice tight coupling between the flat, metal speaker and the cello body, Halldor came up with the idea of cutting some wooden collars which can be shaped to fit the cello back. We’re thinking maybe in rowan, or spruce. The speaker faces inwards on the Halldorophone, but we’re not bothered about phase here. Our feeling is that the logistical desire to be able to fit the cello in a standard case without having to remove the speaker is the main constraint – so the cone could just face outward, the cello body acting like a speaker cabinet.
 3D mock up: a wooden collar can be machine-cut, then hand sanded to fit the curvature of the cellos. This will both maximise acoustic coupling and help reinforce the hole we’ll cut in the cello body
The idea is that the speakers can be bolted into the cellos, meaning they can be removed if necessary (e.g. if blown), but become a permanent fixture.
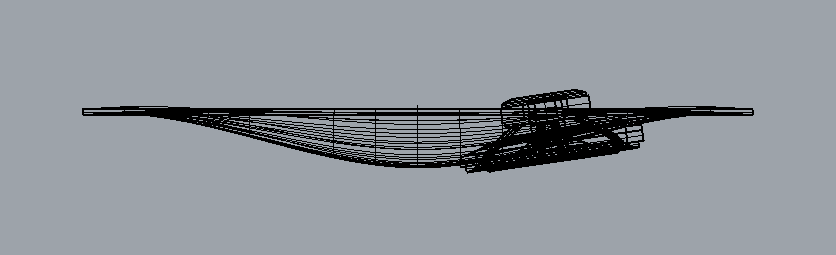
 Side view showing collar fitted to cello back, receiving speaker
Using slightly less sophisticated design tools, we also discussed the idea of having a plywood ‘hole-reinforcer’ on the inside, to give extra support for the bolt holes. I’ve never bolted things onto a cello before, or cut one open, so not really sure how thick the wood is on the body here; we want to make sure the weight of the speaker doesn’t rip through it. That would be bad.
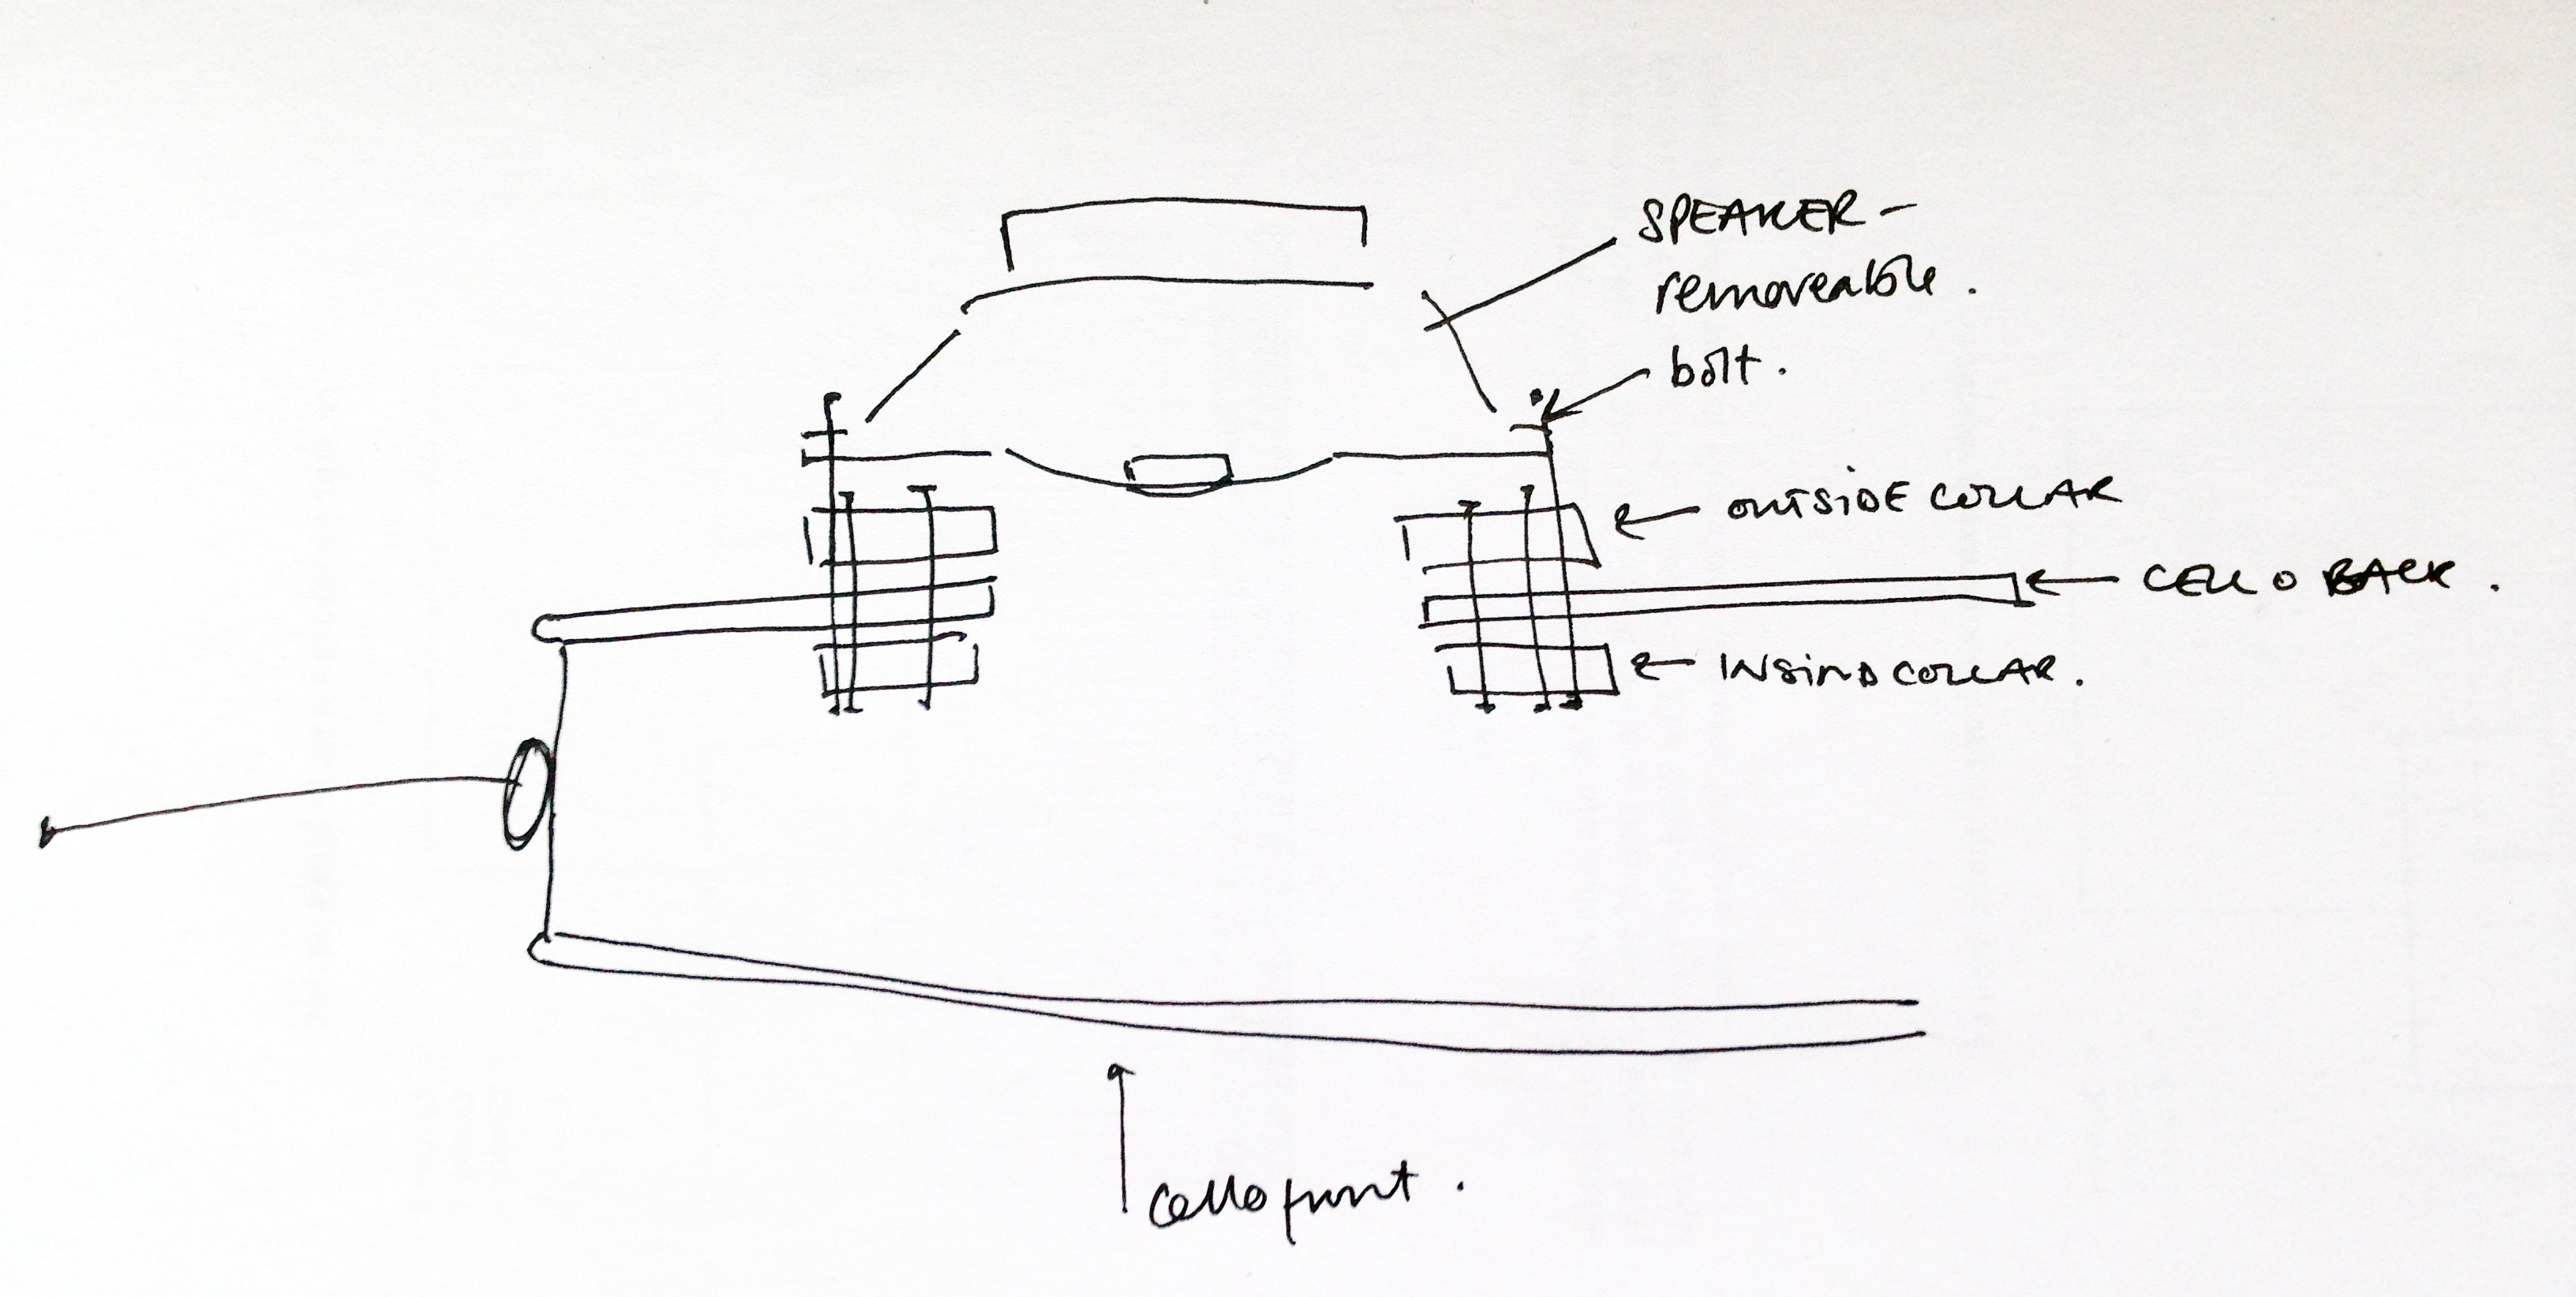 Side sketch showing planned ‘hole-reinforcers’ to ensure house and support internal bolts
DESIGN
design